This article was written quite some time ago and might not be relevant anymore. Please be aware of this before extracting and/or applying anything from this article.
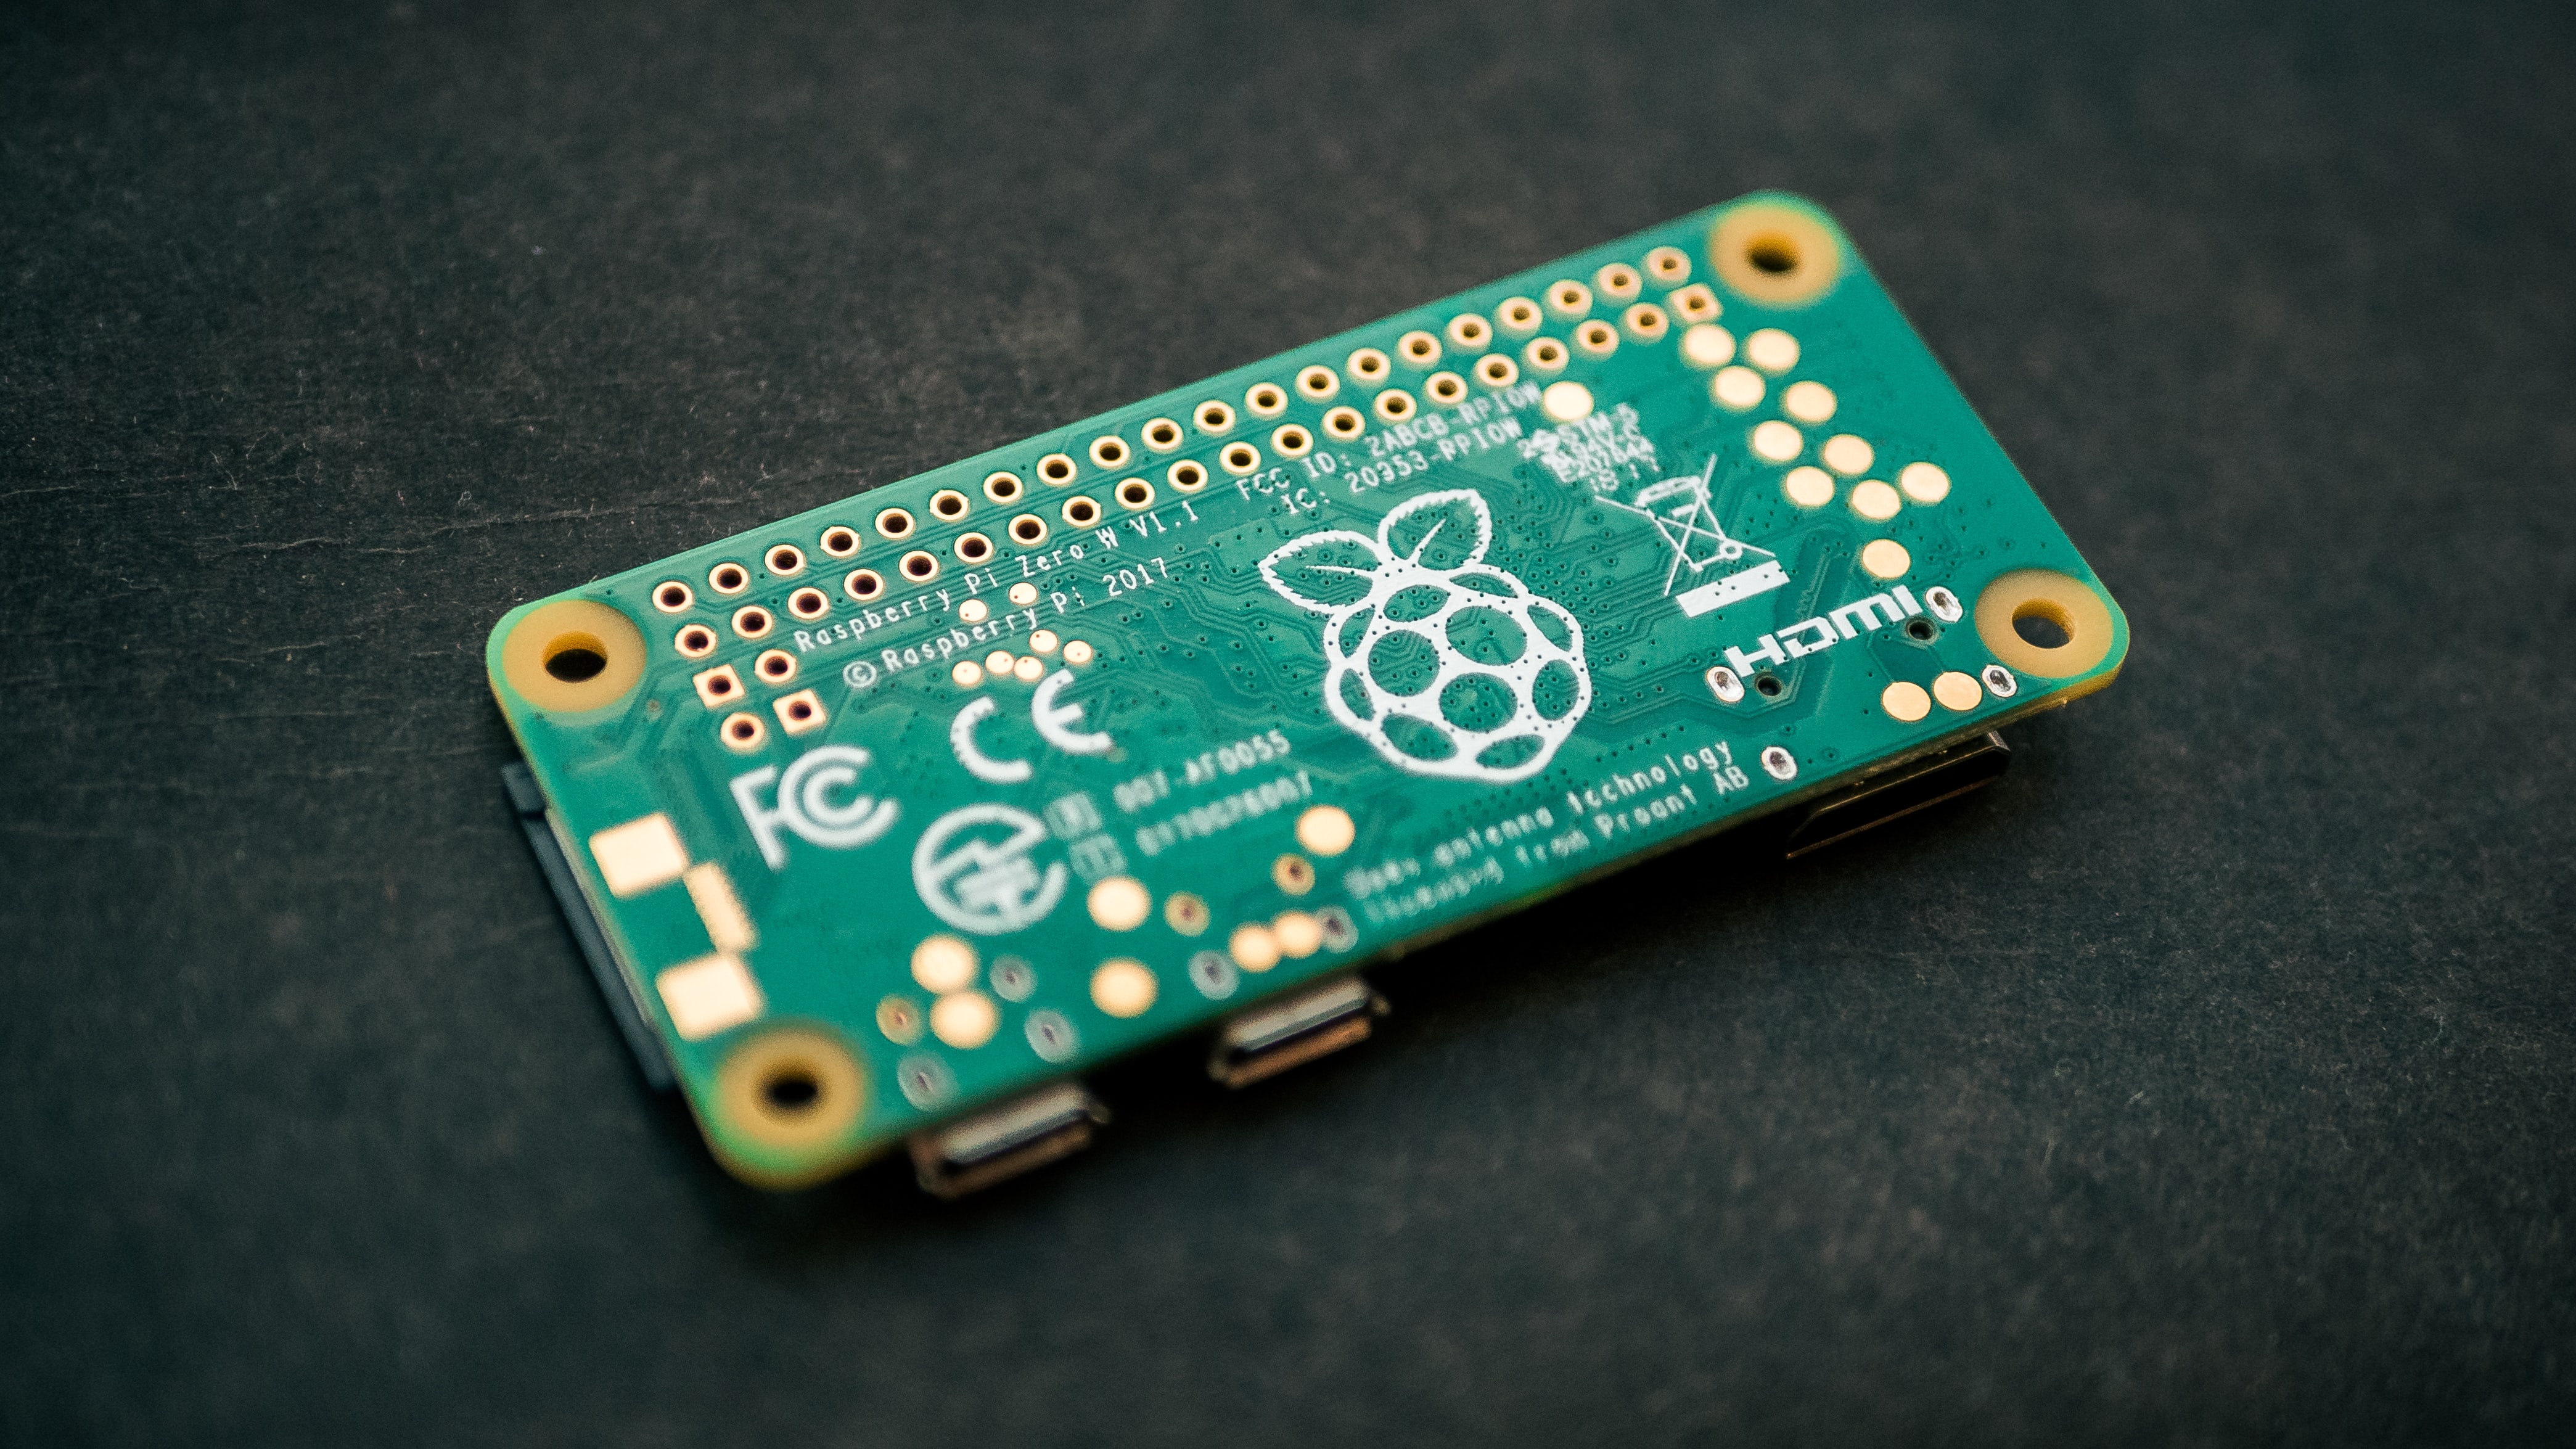
I have recently upgraded my home automation systems and as a result I was able to deprecate the usage of at least one Raspberry Pi 3. I was left with another Pi 3 device that was responsible for monitoring my DSMR (Dutch Smart Metering System). I quickly felt like this device was overkill and best used somewhere else so I decided to replace it with a Raspberry Pi Zero W. This little device is capable of just this and maybe something more.
In order to utilize the most resources from the device I decided trying out DietPi. Below I've written the reason behind my pick of DietPi, how I got it to work and the end result of my setup.
The following instructions are applicable to both the Raspberry Pi Zero and Raspberry Pi Zero W. Of course there is always a probability that some configuration, or complete steps, could be different. I will be writing the following steps using the Raspberry Pi Zero W. Feel free to comment if you are having any problems. Ok, let's go!
Raspberry Pi Zero (W) specifications
- Dimensions: 65mm × 30mm × 5mm
- SoC: Broadcom BCM2835
- CPU: ARM11 running at 1GHz
- RAM: 512MB
- Wireless: 2.4GHz 802.11n wireless LAN
- Bluetooth: Bluetooth Classic 4.1 and Bluetooth LE
- Power: 5V, supplied via micro USB connector
- Video & Audio: 1080P HD video & stereo audio via mini-HDMI connector
- Storage: MicroSD card
- Output: Micro USB
- GPIO: 40-pin GPIO, unpopulated
- Pins: Run mode, unpopulated; RCA composite, unpopulated
- Camera Serial Interface (CSI)
As you can see with 512MB of RAM and a 1 GHz ARM processor the Pi Zero W holds limited resources and one would want to be selective in what services/software would be utilizing (or hogging) these resources.
DietPi introduction
Shameless copy and paste action from the DietPi's website:
DietPi is a highly optimised & minimal Debian-based Linux distribution. DietPi is extremely lightweight at its core, and also extremely easy to install and use.
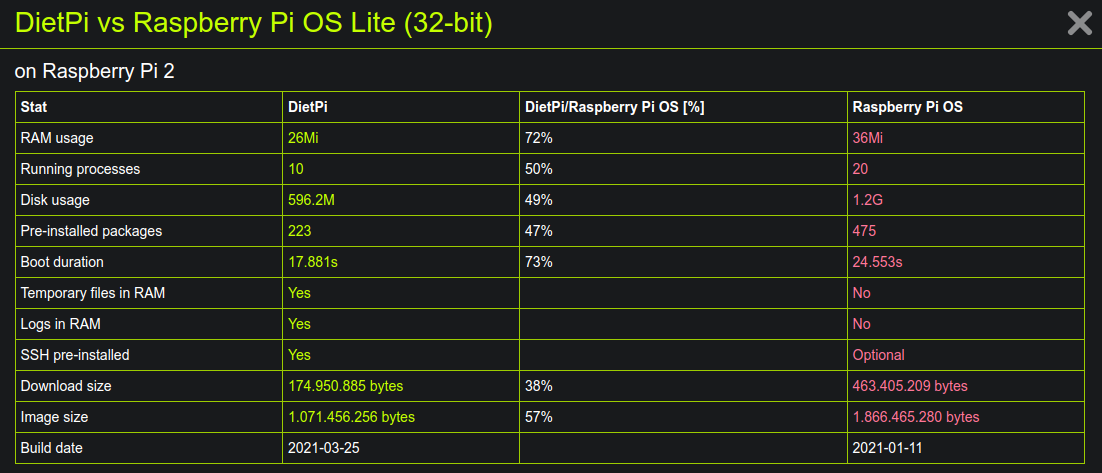
Maximizing available resources is what the team behind DietPi have been doing. By stripping away software that normally would be deployed out-of-the-box by Raspberry Pi OS or Raspbian they managed to deliver a leaner system with significantly less processes.
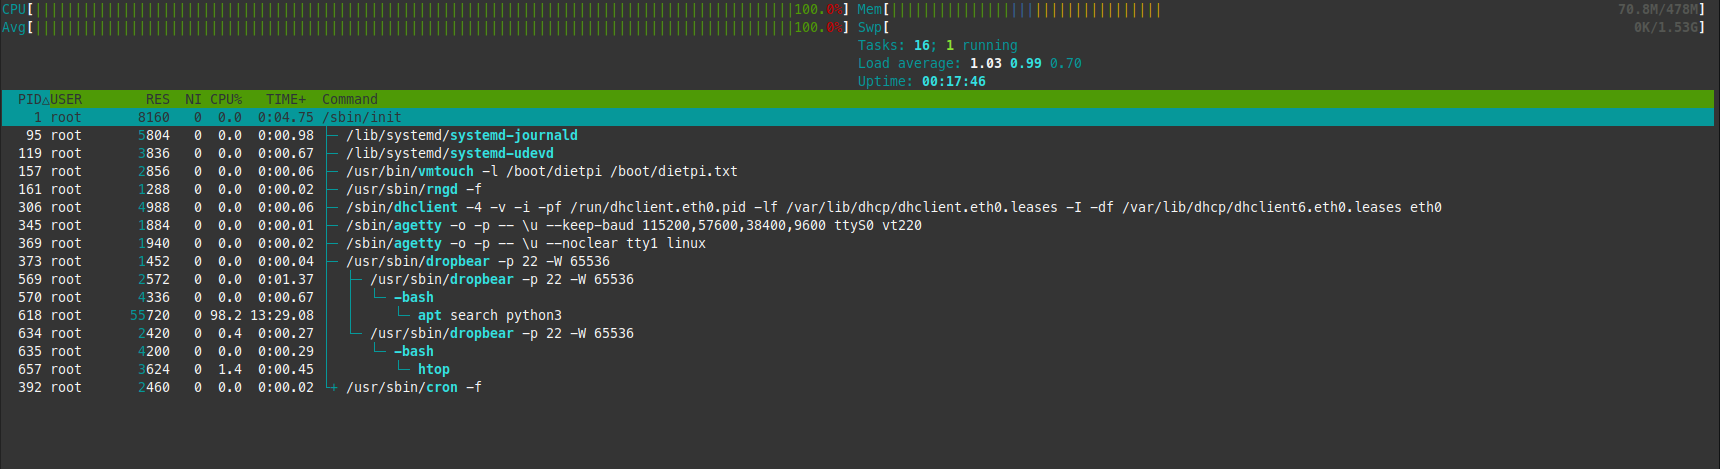
The image below was taking right after I installed the device. Side-note: I was running a search in Python using a different session but still, you can see the processes list is very small.
DietPi offers different other services as well, like configuration backup, automated deploymend/configuration and more. I have no need for any of this since I already have a system in place for all that. Therefore I refer you to their documentation in cause you wish to read more about their full feature set.
How to install DietPi
To be fair, I don't really intend to write much on this subject as the internet is full of articles that explains how to create a SD card with an operating system. Instead I'll give you a link to one of the articles. I prefer the Raspberry Pi Manager method, or the Balena Etcher method.
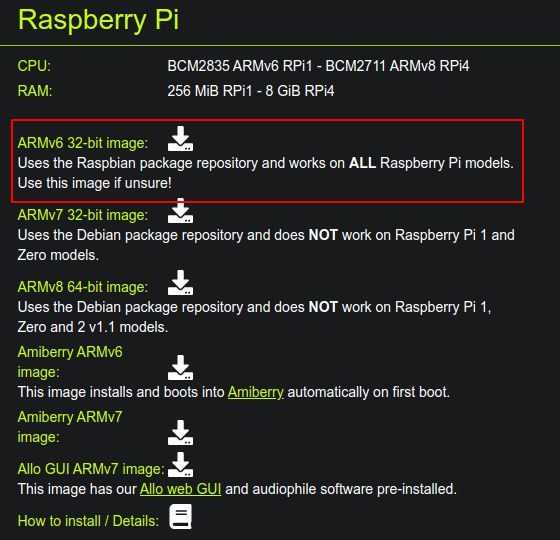
The image you need to use is the ARMv6 32-bit image (link at the moment of writing) as this is supported by the Raspberry Pi Zero W device.
The DietPi first boot allows for configuration and installation of the system/software by applying a autosetup. You can do this by configuring the DietPi.txt file which you will find at the root of your SD card after having flashed the DietPi image. I believe I only changed the hostname and left it at that. For now this is fine for me.
This already concludes the basic preparation of the device. You can unmount the SD card from your device and place the card into the Pi Zero. Connect a monitor and boot the device. The first run will take significantly longer than advertised in the above table but this is to be expected. The system has to do some operations like expanding system partitions, install updates and/or change configuration. This all very much depends on the changes you made in the DietPi.txt file.
If everything goes fine you should be able to login to the system, voila!
Install Docker
Before we start with installing Docker I want to ask you to go over the contents of the script we will be using. Running scripts from the internet is always(!) a risk in terms of security. We will be using the install script provided by Docker which is available over at their Github page docker/docker-install.
Prior to installing Docker I installed
screenwhich makes it able to start a new session within my SSH session where I run commands that might take some time. This allows me to disconnect from session without terminating the process within. This step is completely optional:$ apt install screenNow that we have installed screen we can start a new session:
$ screen
Download and execute the script from get.docker.com to install Docker:
$ curl -fsSL https://get.docker.com -o /tmp/get-docker.sh # this downlods the install script from Docker.
$ sh /tmp/get-docker.sh # this executes the script and starts the install process
Now this might take some time since. In order to disconnect from the screen session and allow it to run it in the background you can press CTRL+A, D. To be clear you first press CTRL+A and then D. If you wish to reconnect to the session you type screen -r. Since we only have one session running in the background it will automatically select the correct session.
If everything goes to plan you will eventually see that the script is finished and hopefully without any warnings! You can close the screen session as you would close a regular session by either typing exit or disconnecting with the CTRL+D shortcut.
Test Docker
Let's see if we can run Docker now!
$ docker run --rm hello-world # will download the "hello-world" image and run a new container (which will be deleted afterwards due to --rm)
Oh, oh, a wild error appears:
Got permission denied while trying to connect to the Docker daemon socket at unix:///var/run/docker.sock: Get "http://%2Fvar%2Frun%2Fdocker.sock/v1.24/containers/json": dial unix /var/run/docker.sock: connect: permission denied
This is because Docker is configured to allow access only if your user is part of the root or docker group. So to fix the permission denied error we have to do exactly that:
$ usermod -aG docker dietpi # this will ADD the `dietpi` user to the `docker` group
In order for this to take effect you have to cycle the groups for your user by reconnecting (reconnect your ssh or log out and into your device locally). If you run the hello-world container it should now give you the following result:

We now have a running Docker container!
Conclusion
The Raspberry Pi Zero W is a small PCB with limited resources to utilize. Running multiple out-of-the-box services from a fresh OS install would mean even less available resources for the services you actually want to use. DietPi comes with a solution to this "problem".
Installing DietPi is as easy as it always is: download their image, "burn" this to a SD card or USB drive and boot the system. You can configure the systems pre-install by going through all the options in the DietPi.txt file located in the root of the SD card or USB drive. First boot might take some more time then originally advertised, this is due to default operations like file-system expansion which takes a little more time. No worries, this only happens at first boot.
You can install Docker using the provided install script from Docker's own repository. Installation will take some time on the Pi Zero W but should succeed. After installation you should add your system user to the docker group, or run as root. Otherwise you will get permission denied errors.
You won't be able to run ALL the Docker images out-of-the-box. Raspberry Pi's CPU is ARM based and therefore can only run images compatible with the same architecture.
If these scribbles have been of some help to you or anyway else, at least they are for me. Please take your time to go through the instructions and feel free to leave a nice comment. Thank you for reading!
This article was written quite some time ago and might not be relevant anymore. Please be aware of this before extracting and/or applying anything from this article.

